|
|
Leave Management
Leave Management allows IXM WEB users to create and configure different types of Leaves as per the company policy. It provides following tabs to save respective information -
Screen Layout of Leave Type
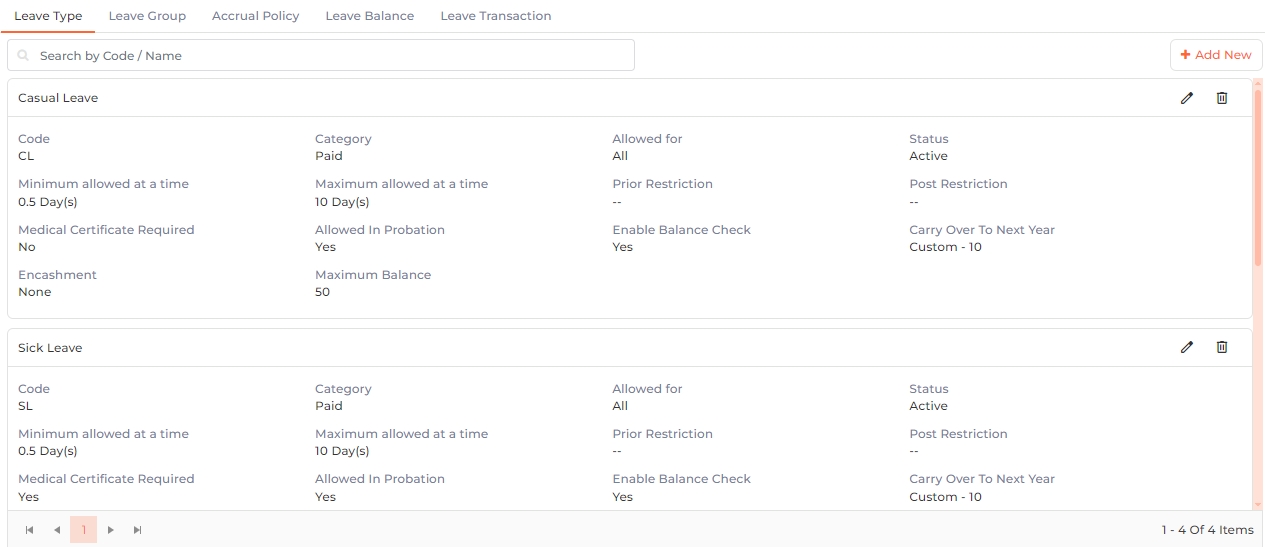
Field Description of Leave Type
Configure different types of Leaves through this option.
Click on Add New button to add a new Leave Type or click on the ![]() icon to edit an existing Leave Type. The following options will be displayed -
icon to edit an existing Leave Type. The following options will be displayed -
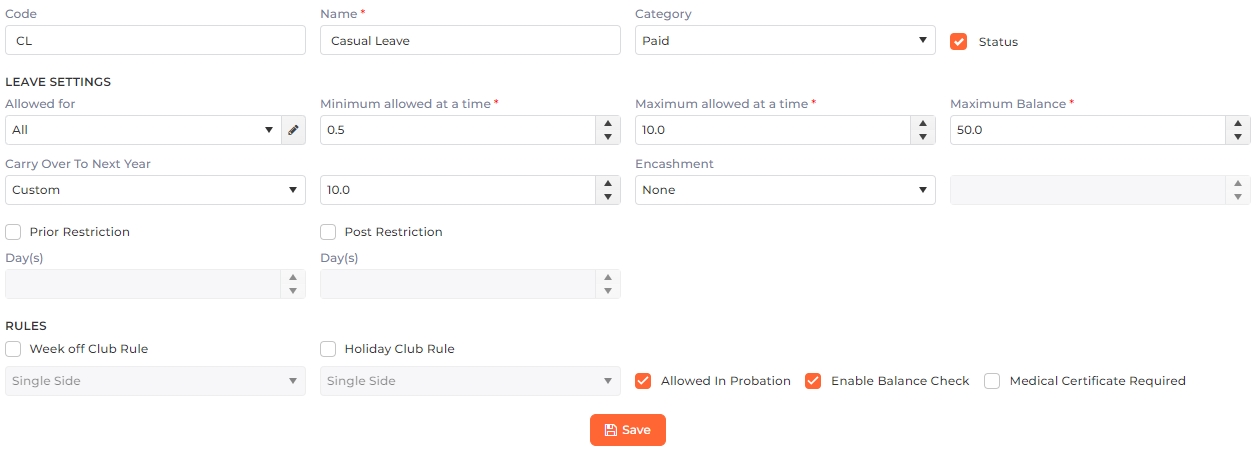
Code:
Enter the unique Code for the Leave.
Name:
Enter the name of the Leave Type.
Category:
Assign a Category to the Leave from the dropdown list.
Select Paid option if the Leave Type is supposed to be a Paid Leave for the Employee. Leave Balance is required for this leave category for leave transaction and request.
Select Unpaid option if the Leave Type is supposed to be an Unpaid Leave for the Employee. Leave Balance is not required for this leave category.
Select Tour option if the Leave Type is supposed to be when an Employee goes on a company tour. Leave Balance is not required for this leave category.
Status
Click on the checkbox to enable or disable the feature. Enable Leave Status to mark the Leave Type as active.
LEAVE SETTINGS
Allowed For:
Select an option from the drop-down list to specify whether the leave applies to all employees or selected employee subsets.
Minimum Allowed at a time:
Specify the minimum number of days for this leave type. Employees will have to request at least these many days when applying for this leave type.
Maximum Allowed at a time:
Specify the maximum number of days for this leave type. Employees will be able to request up to these many days when applying for this leave type.
Maximum Balance:
Specify the maximum balance that employees can have for this Leave type at a time during the Leave Balance period.
Carry Forward To Next Year:
Select an option from the drop-down list to specify and configure whether an employee’s leave balance shall be Carry Forwarded To Next Year or not for this Leave Type.
Encashment:
Select an option from the dropdown list to specify and configure whether encashment is allowed or not for this Leave Type.
Prior Restriction
Click on the checkbox to enable or disable the feature. Enabling this feature will allow the Employee to request this Leave Type before the first leave date.
Days:

This option will be enabled only when Prior Restriction feature is enabled.
Enter the minimum number of days up to which an employee can request this Leave Type before the first leave date.
Post Restriction
Click on the checkbox to enable or disable the feature. Enabling this feature will allow the Employee to request this Leave Type after the last leave date.
Days:

This option will be enabled only when Post Restriction feature is enabled.
Enter the minimum number of days up to which an employee can request this Leave Type after the last leave date.
RULES
Week off Club Rule
Click on the checkbox to enable or disable the rule. Enabling this rule will consider the Week off day as a Leave if it is in continuation with or part of the requested Leave Dates (either before or after or on both sides of Week off). Select an option from the dropdown:
Select Single Side option if Leave is applied before OR after a Week off day then the Week off day(s) will be considered as Leave(s).
Select Both Side option if Leave is applied before AND after Week off day then the Week off day(s) will be considered as Leave(s).
Holiday Club Rule
Click on the checkbox to enable or disable the rule. Enabling this rule will consider a Holiday as a Leave if it is in continuation with or part of the requested Leave Dates (either before or after or on both sides of Holiday). Select an option from the dropdown:
Select Single Side option if Leave is applied before OR after a Holiday then the Holiday(s) will be considered as Leave(s).
Select Both Side option if Leave is applied before AND after a Holiday then the Holiday(s) will be considered as Leave(s).
Allowed in Probation
Click on the checkbox to enable or disable the feature. Disable this flag if this Leave is not allowed in the probation period.
Enable Balance Check
Click on the checkbox to enable or disable the feature. Enable this flag for the Paid Leave category to allow transactions for that leaves.
Medical Certificate Required
Click on the checkbox to enable or disable the feature. Enable this flag if a medical certificate is required to be uploaded by the Employee for this Leave.
Click on Save button to save the Leave Type settings. Click on Cancel button to discard the action.
Select the Leave Type that needs to be deleted and click on Delete button. The application will show a confirmation message as follows -
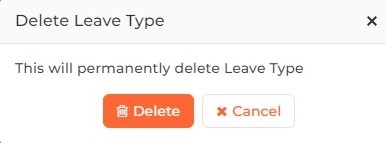
Click on Delete button to delete the selected Leave Type or Cancel button to discard the action.
|
NOTE A Leave Type can not be deleted if it has been assigned to a Leave Group.
|
Screen Layout of Leave Group

Field Description of Leave Group
Create Leave Groups from this option. A Leave Group comprises of one or more Leave Types.
Click on Add New button to add a new Leave Group or click on Edit button to edit an existing Leave Group. The following options will be displayed -
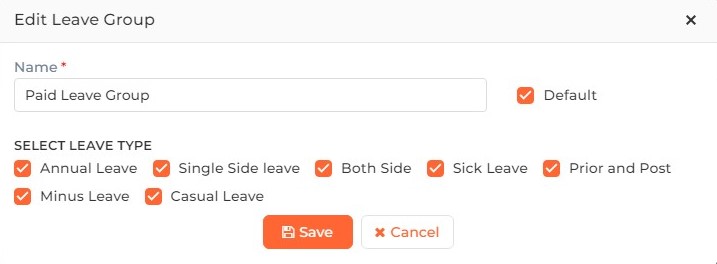
Name:
Enter the name of the Leave Group.
Default
Click on the checkbox to enable or disable the feature. Enable it if you want to set this Leave Group as the default Group.
SELECT LEAVE TYPE
Select the Leave Types by clicking on their respective checkboxes. Selected Leave Types will be applied to this Leave Group. When this Group is assigned to an Employee, all the Leave Types of the Leave Group will be applied to the Employee.
Click on Save button to save the Leave Groups. Click on Cancel button to discard the action.
Select the Leave Group that needs to be deleted and click on Delete button. The application will show a confirmation message as follows -
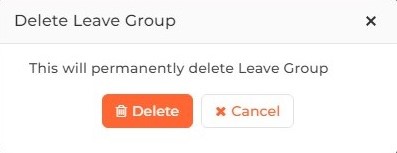
Click on Delete button to delete the selected Leave Group or Cancel button to discard the action.
|
NOTE A Leave Group can not be deleted if it has been assigned to an Employee.
|
Screen Layout of Accrual Policy
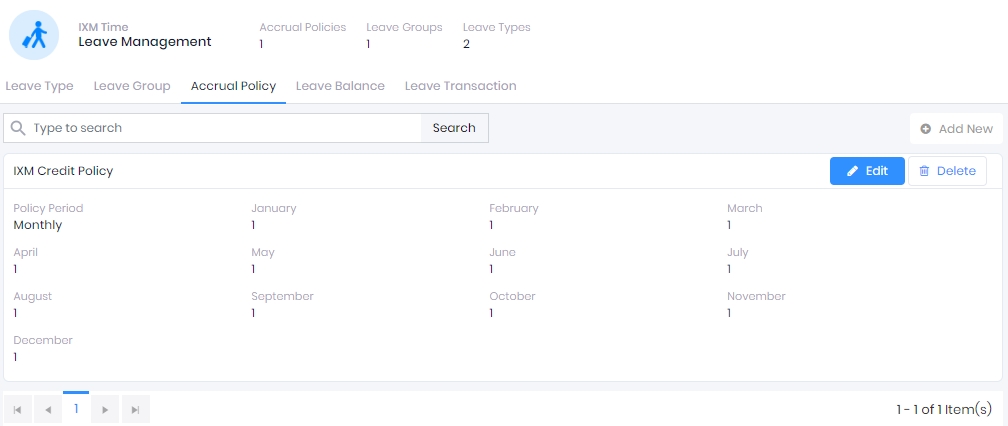
Field Description of Accrual Policy
Leave Balance is credited to the employees as per the company’s accrual policy.
Click on Add New button to add a new Accrual Policy or click on Edit button to edit an existing Accrual Policy. The following options will be displayed -
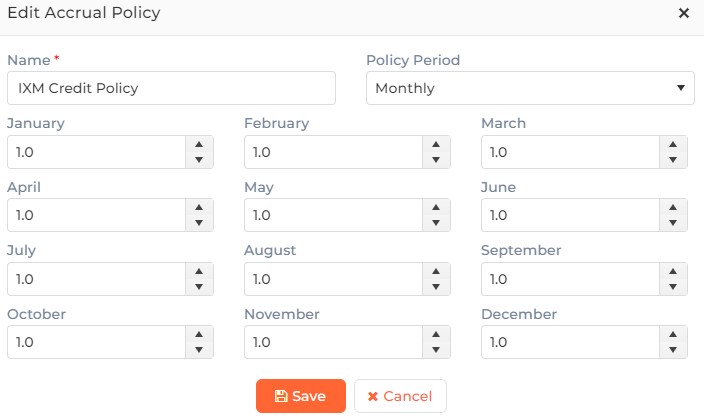
Name:
Specify the Name for the Accrual Policy.
Policy Period:
Select the Policy Period from the dropdown list to specify whether the Accrual will be monthly or yearly.
If the Policy Period is selected as "Monthly", enter the leave balance that has to be credited for each month.
If the Policy Period is selected as "Yearly", enter the leave balance that has to be credited for the year as follows -

Click on Save button to save the Accrual Policy. Click on Cancel button to discard the action.
Select Accrual Policies that need to be deleted. To select multiple Policies, tap and hold CTRL and select the required Policies. Click on Delete button. The application will show a confirmation message as follows -
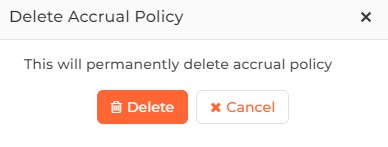
Click on Delete button to delete the selected Accrual Policy or Cancel button to discard the action.
Screen Layout of Leave Balance

Field Description of Leave Balance
Leave Balance will allow IXM WEB users to view an Employee’s Leave Balance in detail for a selected period. Leave Balance can also be viewed for a particular Leave Type for the selected period.
Employee:
Select the Employee from the dropdown list.
Leave Type:
Select the Leave Type from dropdown list.
Period:
Select the Period as either "Monthly" or "Yearly" from the dropdown list.
Month:

|
This option will be displayed only when Period is selected as "Monthly". |
Select the Month from dropdown list.
Year:
Select the Year from the from dropdown list.
Once selected, click on Search button to view details.
Screen Layout of Leave Transaction
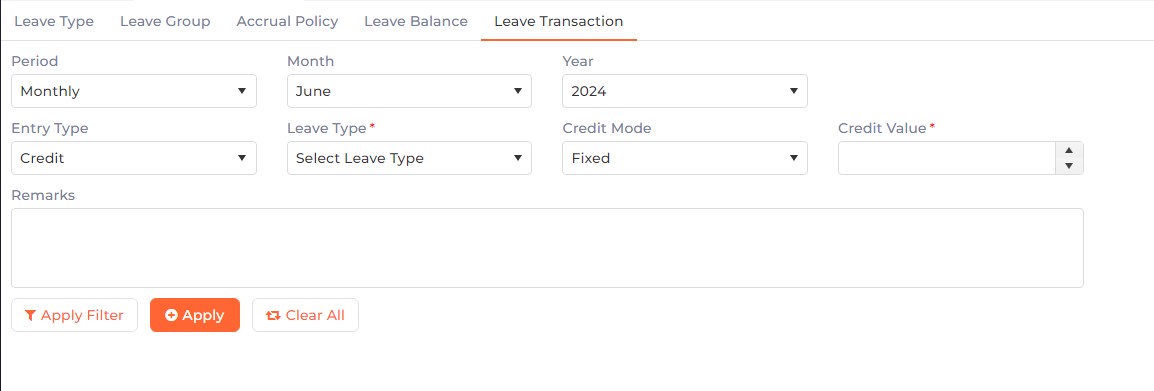
Field Description of Leave Transaction
IXM WEB users can credit leave(s) to an Employee on a monthly and/or yearly basis. Leaves can also be debited and encashed from an employee’s existing leave balance in case adjustment is required.
Period:
Select the period as "Monthly" or "Yearly" for the leave transaction from the dropdown list.
Month-Year:

|
This option will be displayed only when Period is selected as "Monthly". |
Select the Month for this leave transaction from the dropdown list.
Entry Type:
Select the Entry Type for the leave transaction. Select "Credit","Debit" or "Enchash" from the dropdown list.
Leave Type:
Select the Leave Type for which you want to perform the leave transaction.
Remarks:
Specify remarks for that transaction.
Click on Apply Filter button to perform the transaction for particular Employee(s).
Click on Applybutton to perform that transaction for All T&A Employee(s).
Click on Clear All button to remove the selection.